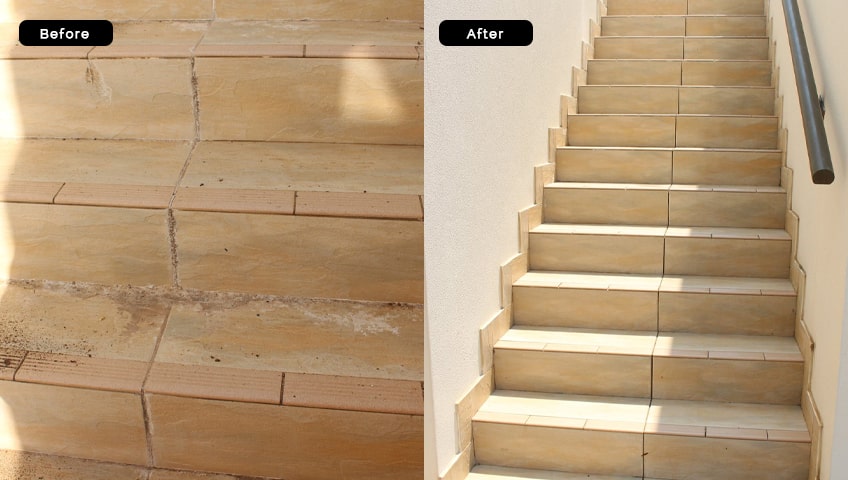
Tile Grout Efflorescence – Removal and How to Prevent Reoccurrence
Understanding Tile Grout Efflorescence
Tile grout efflorescence is a common issue that can affect the appearance and longevity of your tiled surfaces. This unsightly phenomenon occurs when soluble salts and minerals in the grout are brought to the surface, leaving behind white, powdery deposits. If left untreated, efflorescence can mar the beauty of your tiles and weaken the grout over time. In this article, we will explore the causes of tile grout efflorescence, how to remove it, and crucial steps to prevent its reoccurrence.
What Causes Tile Grout Efflorescence?
Efflorescence occurs due to a combination of factors, primarily involving water, minerals, and the porous nature of grout. Here’s how it happens:
1. Moisture Infiltration:
Water infiltrates the grout lines through various sources such as rain, humidity, or even improper cleaning methods. As the water evaporates, it carries dissolved salts and minerals from within the grout to the surface.
2. Porous Grout:
Grout is inherently porous, making it an ideal environment for water to seep in. This characteristic allows efflorescence to form and become more pronounced over time.
3. Soluble Salts:
The grout and surrounding construction materials may contain soluble salts. When water reaches these salts within the grout, it dissolves them and transports them to the surface.
Removing Tile Grout Efflorescence
Efflorescence is more than just an aesthetic issue; it can lead to grout deterioration if left untreated. Fortunately, there are effective ways to remove it:
1. Materials You’ll Need:
• Protective gear: Safety goggles, gloves, and a mask.
• Water: Distilled or deionized water is preferable.
• Grout cleaner: Choose a commercial grout cleaner or make a DIY solution using equal parts white vinegar and water.
• Grout brush: A stiff brush will help agitate the efflorescence.
• Soft cloth or sponge: To wipe away residue.
• Sealer: To prevent future efflorescence (more on this later).
2. Removal Steps:
a. Safety First: Put on your protective gear.
b. Wet the Area: Dampen the affected area with water to loosen the efflorescence.
c. Apply Grout Cleaner: Follow the manufacturer’s instructions for your chosen grout cleaner. Apply it to the affected area and let it sit for the recommended time.
d. Scrub: Use the grout brush to scrub the area gently. This will help dislodge the efflorescence.
e. Rinse: Thoroughly rinse the area with distilled or deionized water to remove any remaining cleaner and efflorescence residue.
f. Dry: Allow the grout to dry completely before proceeding.
3. Prevent Reoccurrence:
Preventing efflorescence from returning is essential to maintain the appearance and structural integrity of your tiled surfaces. Here’s how to do it:
Preventing Tile Grout Efflorescence
1. Choose the Right Grout:
Opt for high-quality grout with low water-absorption properties. Epoxy grout, for example, is less porous and less susceptible to efflorescence.
2. Proper Mixing and Installation:
Follow the manufacturer’s instructions when mixing and applying grout. Ensure that it is correctly mixed and evenly applied to minimize the risk of efflorescence.
3. Seal Your Grout:
Applying a grout sealer is one of the most effective ways to prevent efflorescence. The sealer creates a protective barrier that inhibits moisture and salts from penetrating the grout.
4. Adequate Ventilation:
Ensure that the tiled area has proper ventilation to reduce humidity levels. Good airflow can help prevent moisture from accumulating and causing efflorescence.
5. Regular Cleaning:
Regularly clean your tiled surfaces with a pH-neutral cleaner to remove dirt and grime. Avoid acidic or alkaline cleaners, as they can disrupt the grout’s pH balance and increase the risk of efflorescence.
In conclusion, tile grout efflorescence is a common issue that can be effectively managed and prevented. By understanding its causes, using proper removal techniques, and taking preventative measures, you can keep your tiled surfaces looking their best and free from unsightly white deposits. Remember that proper grout selection, installation, and sealing are key to ensuring the long-term beauty and durability of your tiled spaces.


